Introduction
Hello, everyone! Lana here, welcome back to the series where I teach you how to make applications using GTK. In the previous post, we created a simple Hello World application. Today we will be building upon that so make sure to give it a read if you are new here :3
In a GTK application, the interface is primarily defined by the use of widgets, which are the building blocks for creating interactive elements and layouts. From a web-developer’s point of view, widgets like GtkButton, GtkLabel and GtkEntry are analogous to <button>, <label> and <input>. Here’s a list of widgets provided by GTK along with their visual illustration. It can be used as reference and a good starting point while we create our application.
We’ll be building a simple To-Do list application today. This project introduces essential concepts like input handling and state management, along with layout organization and event handling in GTK.
So let’s get started.
Prerequisites
Although it isn’t essential, if you haven’t setup your development environment yet, refer to the previous post if you face issues while setting up the IDE or CMake.
Dependencies
GTK 4GDKGObjectGLib
You can install them for your linux distribution by using,
sudo apt install libgtk-4-devsudo dnf install gtk4-develsudo pacman -S gtk4CMake Configuration
cmake_minimum_required(VERSION 3.20)
project(ToDoList C)
set(CMAKE_C_STANDARD 11)
set(SOURCE_FILES main.c)
find_package(PkgConfig REQUIRED)
pkg_check_modules(GTK REQUIRED gtk4)
include_directories(${GTK_INCLUDE_DIRS})
link_directories(${GTK_LIBRARY_DIRS})
add_executable(${PROJECT_NAME} ${SOURCE_FILES})
target_link_libraries(${PROJECT_NAME} ${GTK_LIBRARIES})Writing the Application
Let’s get into writing the application, we will first make the window and then add in the child widgets one by one,
Setting up the Main Window
First we will be writing the boilerplate code required to create a new window :p
#include <gtk/gtk.h>
static void
activate (GtkApplication *app,
gpointer user_data)
{
GtkWidget *window;
window = gtk_application_window_new (app);
gtk_window_set_title (GTK_WINDOW (window), "To-Do List");
gtk_window_set_default_size (GTK_WINDOW (window), 300, 400);
gtk_window_present (GTK_WINDOW (window));
}
int
main (int argc,
char **argv)
{
GtkApplication *app;
int status;
app = gtk_application_new ("com.mirubytes.ToDoList", G_APPLICATION_DEFAULT_FLAGS);
g_signal_connect (app, "activate", G_CALLBACK (activate), NULL);
status = g_application_run (G_APPLICATION (app), argc, argv);
g_object_unref (app);
return status;
}Here we have set the basic fields such as window title, default_size and ApplicationId and bootstrapped the window to open on application startup.
Adding the Basic Layout
We have yoinked a reference image from the internet for the purpose of not having to design a layout :p
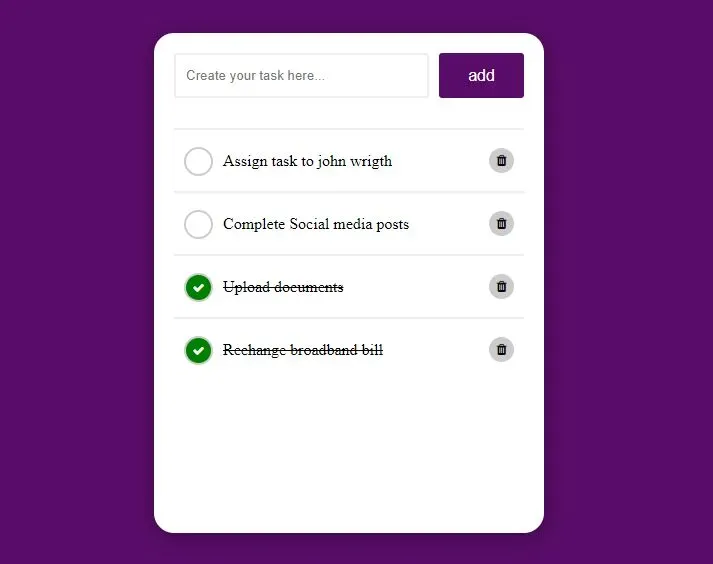
In the image above you can see that there are two sections which can be divided vertically. The upper section used for getting user input for task name and the bottom section to list the tasks we have added.
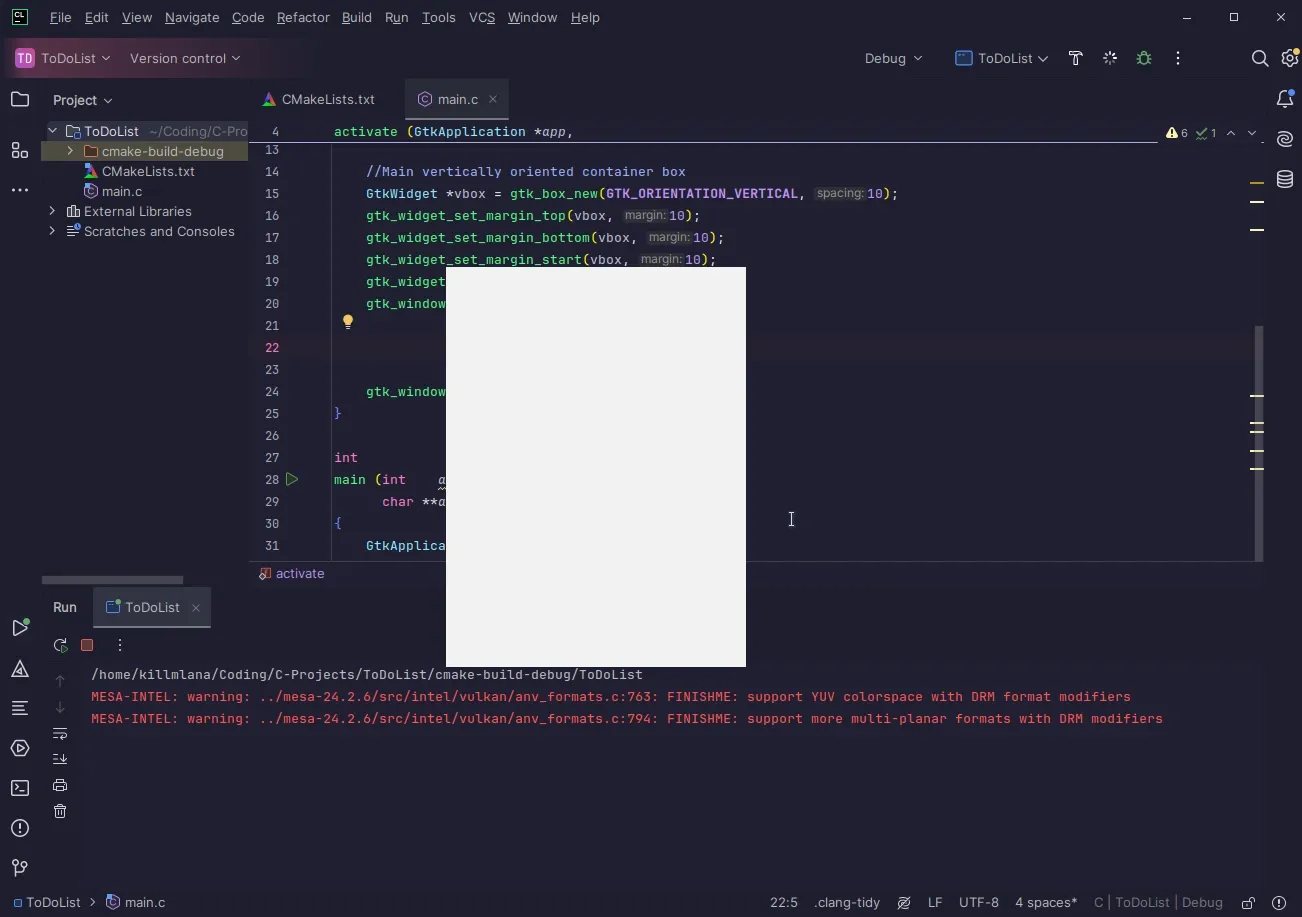
First are gonna define a vertical container for rest of the widgets, within the window. We are also adding a margin of 10px.
static void
activate (GtkApplication *app,
gpointer user_data)
{
GtkWidget *window;
//Main Window
window = gtk_application_window_new (app);
gtk_window_set_title (GTK_WINDOW (window), "To-Do List");
gtk_window_set_default_size (GTK_WINDOW (window), 300, 400);
//Main vertically oriented container box
GtkWidget *vbox = gtk_box_new(GTK_ORIENTATION_VERTICAL, 10);
gtk_widget_set_margin_top(vbox, 10);
gtk_widget_set_margin_bottom(vbox, 10);
gtk_widget_set_margin_start(vbox, 10);
gtk_widget_set_margin_end(vbox, 10);
gtk_window_set_child(GTK_WINDOW(window), vbox);
gtk_window_present (GTK_WINDOW (window));
}
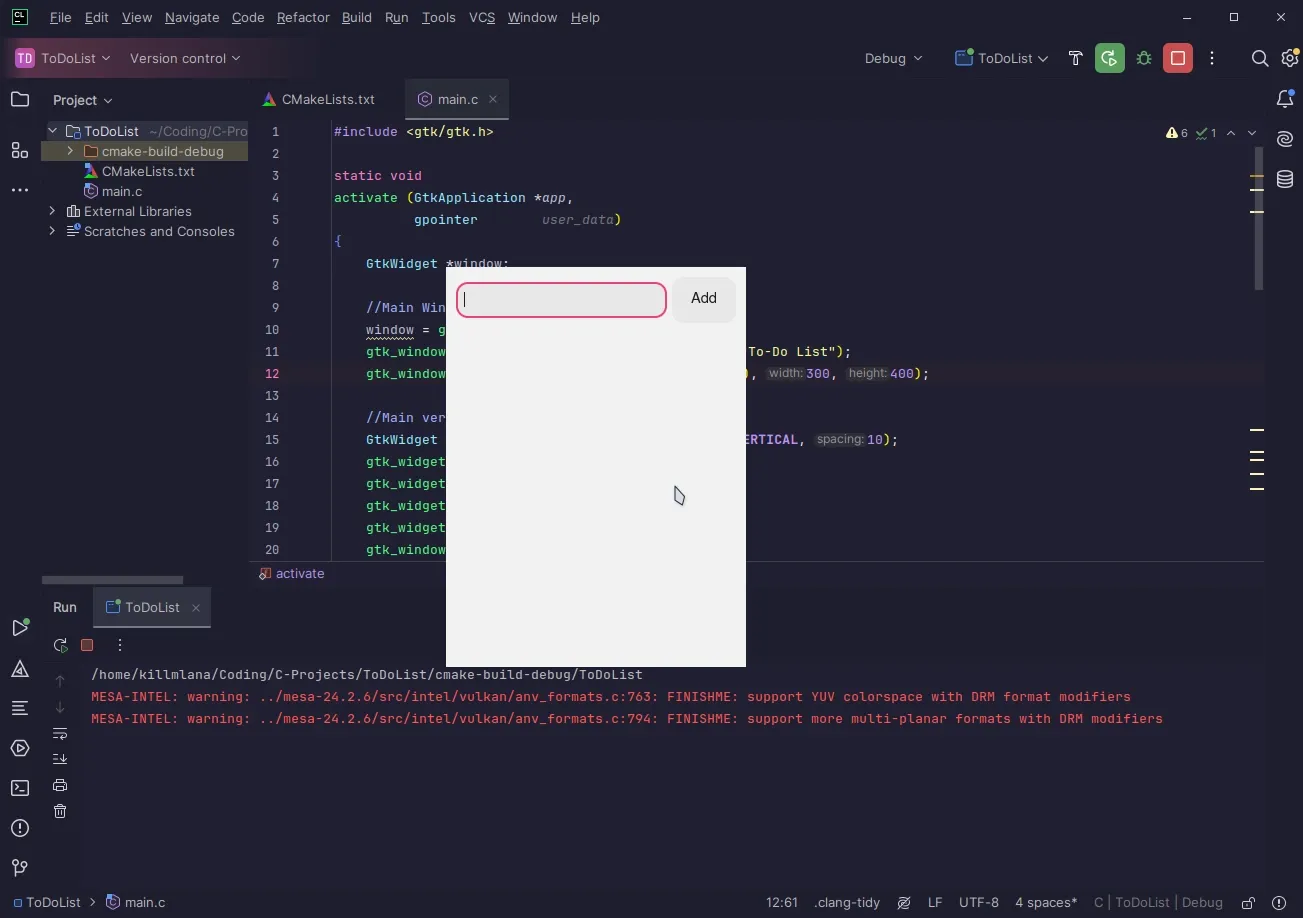
We will now add in the layout for handling user input
static void
activate (GtkApplication *app,
gpointer user_data)
{
GtkWidget *window;
//Main Window
window = gtk_application_window_new (app);
gtk_window_set_title (GTK_WINDOW (window), "To-Do List");
gtk_window_set_default_size (GTK_WINDOW (window), 300, 400);
//Main vertically oriented container box
GtkWidget *vbox = gtk_box_new(GTK_ORIENTATION_VERTICAL, 10);
gtk_widget_set_margin_top(vbox, 10);
gtk_widget_set_margin_bottom(vbox, 10);
gtk_widget_set_margin_start(vbox, 10);
gtk_widget_set_margin_end(vbox, 10);
gtk_window_set_child(GTK_WINDOW(window), vbox);
//Container with entry-field and add button
GtkWidget *top_box = gtk_box_new(GTK_ORIENTATION_HORIZONTAL, 5);
gtk_box_set_homogeneous(GTK_BOX(top_box), FALSE);
gtk_box_append(GTK_BOX(vbox), top_box);
GtkWidget *entry = gtk_entry_new();
gtk_widget_set_hexpand(entry, TRUE);
gtk_widget_set_margin_top(entry, 5);
gtk_widget_set_margin_bottom(entry, 5);
gtk_box_append(GTK_BOX(top_box), entry);
GtkWidget *add_button = gtk_button_new_with_label("Add");
gtk_box_append(GTK_BOX(top_box), add_button);
gtk_window_present (GTK_WINDOW (window));
}Here we are adding three widgets:
top_boxwhich is the container at the top of ourvboxcontainer.gtk_box_set_homogeneous(GTK_BOX(top_box), FALSE)sets that the children of ourtop_boxcontainer won’t be of the same size.entrywhich is the entry field widget for taking in user input.add_buttonwhich is the button which will be used to add tasks to the list.
Next step involves adding the second section of our application i.e. the list of tasks
static void
activate (GtkApplication *app,
gpointer user_data)
{
GtkWidget *window;
//Main Window
window = gtk_application_window_new (app);
gtk_window_set_title (GTK_WINDOW (window), "To-Do List");
gtk_window_set_default_size (GTK_WINDOW (window), 300, 400);
//Main vertically oriented container box
GtkWidget *vbox = gtk_box_new(GTK_ORIENTATION_VERTICAL, 10);
gtk_widget_set_margin_top(vbox, 10);
gtk_widget_set_margin_bottom(vbox, 10);
gtk_widget_set_margin_start(vbox, 10);
gtk_widget_set_margin_end(vbox, 10);
gtk_window_set_child(GTK_WINDOW(window), vbox);
//Container with entry-field and add button
GtkWidget *top_box = gtk_box_new(GTK_ORIENTATION_HORIZONTAL, 5);
gtk_box_set_homogeneous(GTK_BOX(top_box), FALSE);
gtk_box_append(GTK_BOX(vbox), top_box);
GtkWidget *entry = gtk_entry_new();
gtk_widget_set_hexpand(entry, TRUE);
gtk_widget_set_margin_top(entry, 5);
gtk_widget_set_margin_bottom(entry, 5);
gtk_box_append(GTK_BOX(top_box), entry);
GtkWidget *add_button = gtk_button_new_with_label("Add");
gtk_box_append(GTK_BOX(top_box), add_button);
//Widget which will display our list of tasks
GtkWidget *task_list = gtk_list_box_new();
gtk_widget_set_vexpand(task_list, TRUE);
gtk_box_append(GTK_BOX(vbox), task_list);
gtk_window_present (GTK_WINDOW (window));
}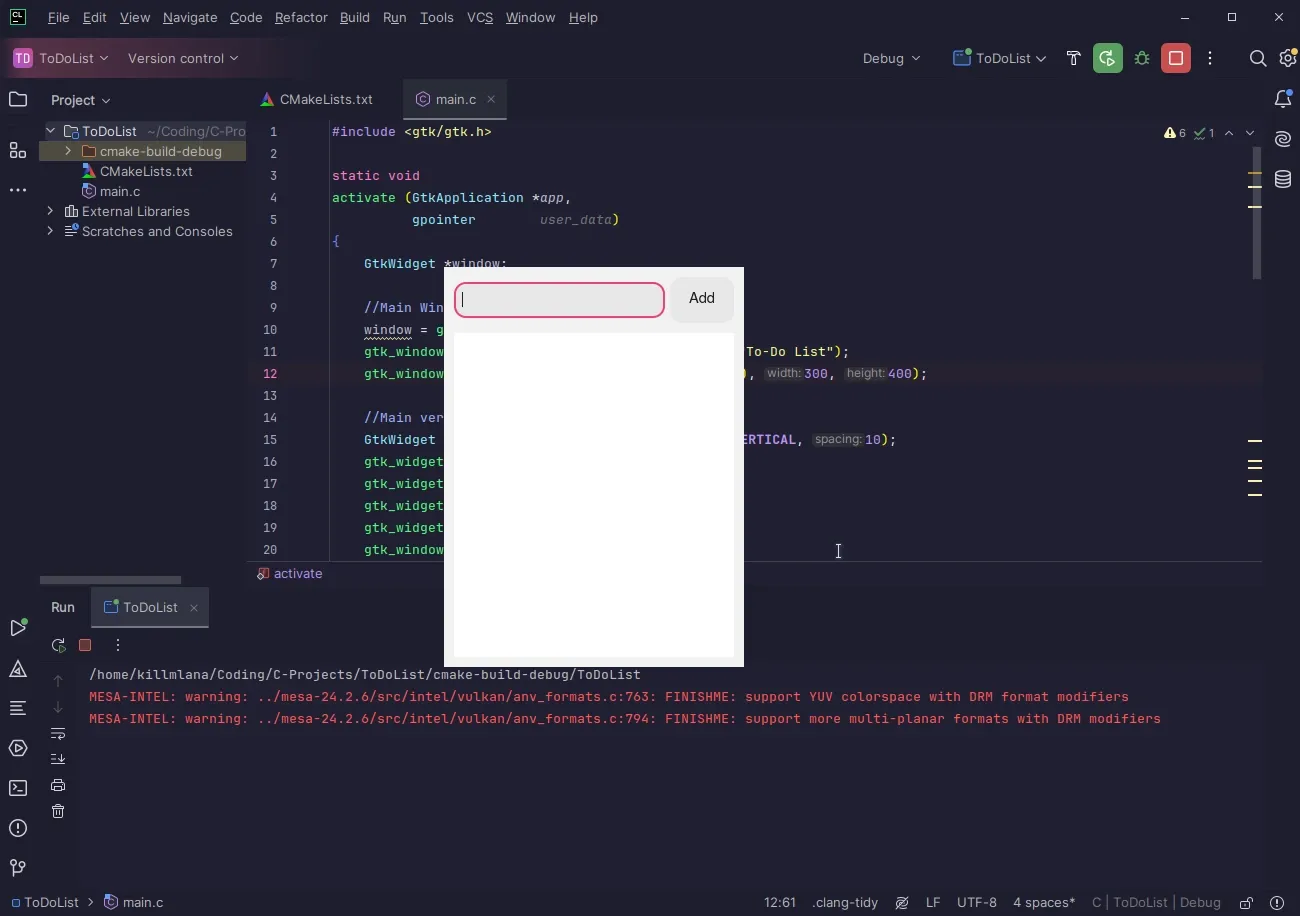
Now we are gonna define the layout of the list elements. We can use GtkCheckButton for this purpose. We will be defining it in a new function which will be responsible for the creation of the task widgets.
static GtkWidget* create_new_task(const char *title) {
GtkWidget *task_box = gtk_box_new(GTK_ORIENTATION_HORIZONTAL, 5);
GtkWidget *checkbutton = gtk_check_button_new_with_label(title);
gtk_box_append(GTK_BOX(task_box), checkbutton);
return task_box;
}Here we are taking a string as parameter and using that string to create the elements for our list of tasks.
Thus our layout is finished, although it’s not functional at the moment. Let’s add the logic behind the working of our application.
Adding the Application Logic
Our layout is finished, although it doesn’t really do anything. We need to define the logic for our application to be functional.
Task Creation
We will first edit our previously made create_new_task() function. This will be the callback function which will be invoked when the add_button is clicked.
In GTK it’s essential to adhere to the function signature, in this case, our callback function should include the parameters GtkButton *button and user data pointer.
We will be passing two parameters to the callback function:
GtkEntry *entrywhich is the input field widget.GtkListBox *task_listwhich is the widget containing the list of tasks.
Since callbacks in GTK can only be invoked with a single user data parameter, we need to define a struct first to encapsulate the data and then pass the pointer of that struct as user data.
struct task_data {
GtkEntry *input;
GtkListBox *list;
};The callback function should look something like this,
static void create_new_task(GtkButton *button, const struct task_data *data) {
}Next step is to get the text from the entry widget and add it to the list of tasks,
static void create_new_task(GtkButton *button, const struct task_data *data) {
GtkWidget *task_box = gtk_box_new(GTK_ORIENTATION_HORIZONTAL, 30);
GtkEntryBuffer *buffer = gtk_entry_get_buffer(data->input);
const gchar *task_text = gtk_entry_buffer_get_text(buffer);
GtkWidget *checkbutton = gtk_check_button_new_with_label(task_text);
gtk_box_append(GTK_BOX(task_box), checkbutton);
gtk_list_box_append(data->list, task_box);
}Each GtkEntry widget has an associated GtkEntryBuffer, which manages the text input. To retrieve the text entered by the user, we first obtain the GtkEntryBuffer from the GtkEntry widget and then use it to fetch the text.
After obtaining the text, we create a GtkCheckButton with the retrieved text as its label. We then add this checkbutton to a container task_box and append task_box to the list task_list to display it as part of the to-do list.
Now that we have our create_new_task function ready, it’s time to tie it to a button click event. To do this, we need to set up a callback in the activate function, which will be invoked whenever the user clicks the “Add” button.
GTK, button click events are handled using signals, and we can associate a function with a button’s “clicked” signal. When the button is clicked, GTK automatically calls the function we’ve connected to this signal. This can be done by,
static void
activate (GtkApplication *app,
gpointer user_data)
{
GtkWidget *window;
//Main Window
window = gtk_application_window_new (app);
gtk_window_set_title (GTK_WINDOW (window), "To-Do List");
gtk_window_set_default_size (GTK_WINDOW (window), 300, 400);
//Main vertically oriented container box
GtkWidget *vbox = gtk_box_new(GTK_ORIENTATION_VERTICAL, 10);
gtk_widget_set_margin_top(vbox, 10);
gtk_widget_set_margin_bottom(vbox, 10);
gtk_widget_set_margin_start(vbox, 10);
gtk_widget_set_margin_end(vbox, 10);
gtk_window_set_child(GTK_WINDOW(window), vbox);
//Container with entry-field and add button
GtkWidget *top_box = gtk_box_new(GTK_ORIENTATION_HORIZONTAL, 5);
gtk_box_set_homogeneous(GTK_BOX(top_box), FALSE);
gtk_box_append(GTK_BOX(vbox), top_box);
GtkWidget *entry = gtk_entry_new();
gtk_widget_set_hexpand(entry, TRUE);
gtk_widget_set_margin_top(entry, 5);
gtk_widget_set_margin_bottom(entry, 5);
gtk_box_append(GTK_BOX(top_box), entry);
GtkWidget *add_button = gtk_button_new_with_label("Add");
gtk_box_append(GTK_BOX(top_box), add_button);
//Widget which will display our list of tasks
GtkWidget *task_list = gtk_list_box_new();
gtk_widget_set_vexpand(task_list, TRUE);
gtk_box_append(GTK_BOX(vbox), task_list);
struct task_data *data = g_new(struct task_data, 1);
data->input = GTK_ENTRY(entry);
data->list = GTK_LIST_BOX(task_list);
g_signal_connect(add_button, "clicked", G_CALLBACK (create_new_task), data );
gtk_window_present (GTK_WINDOW (window));
}Here we are initialising our struct and then passing the pointer to it in the callback function, as data.
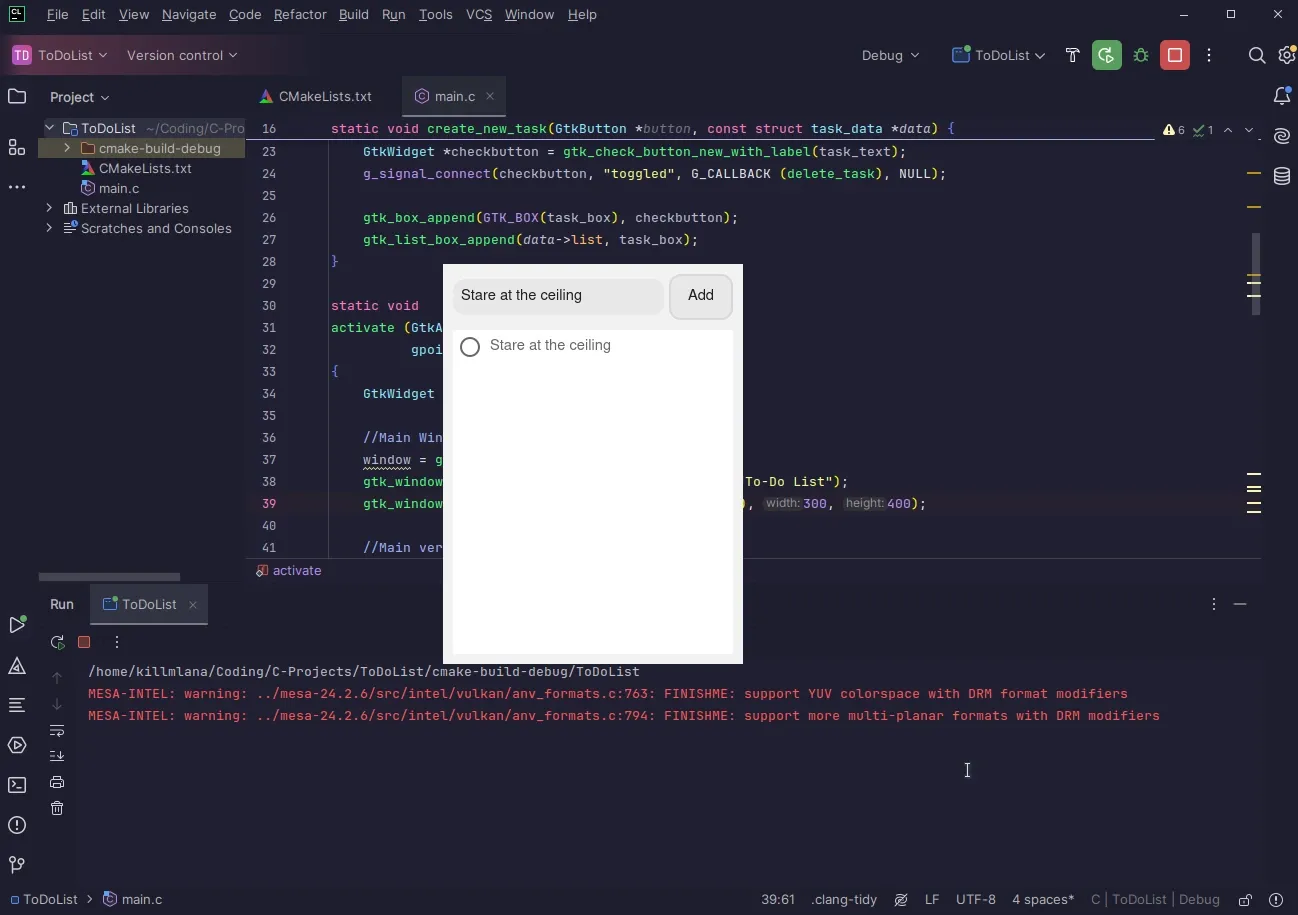
Yay! Our application should append tasks to the list when we click the Add button now.
Task Deletion
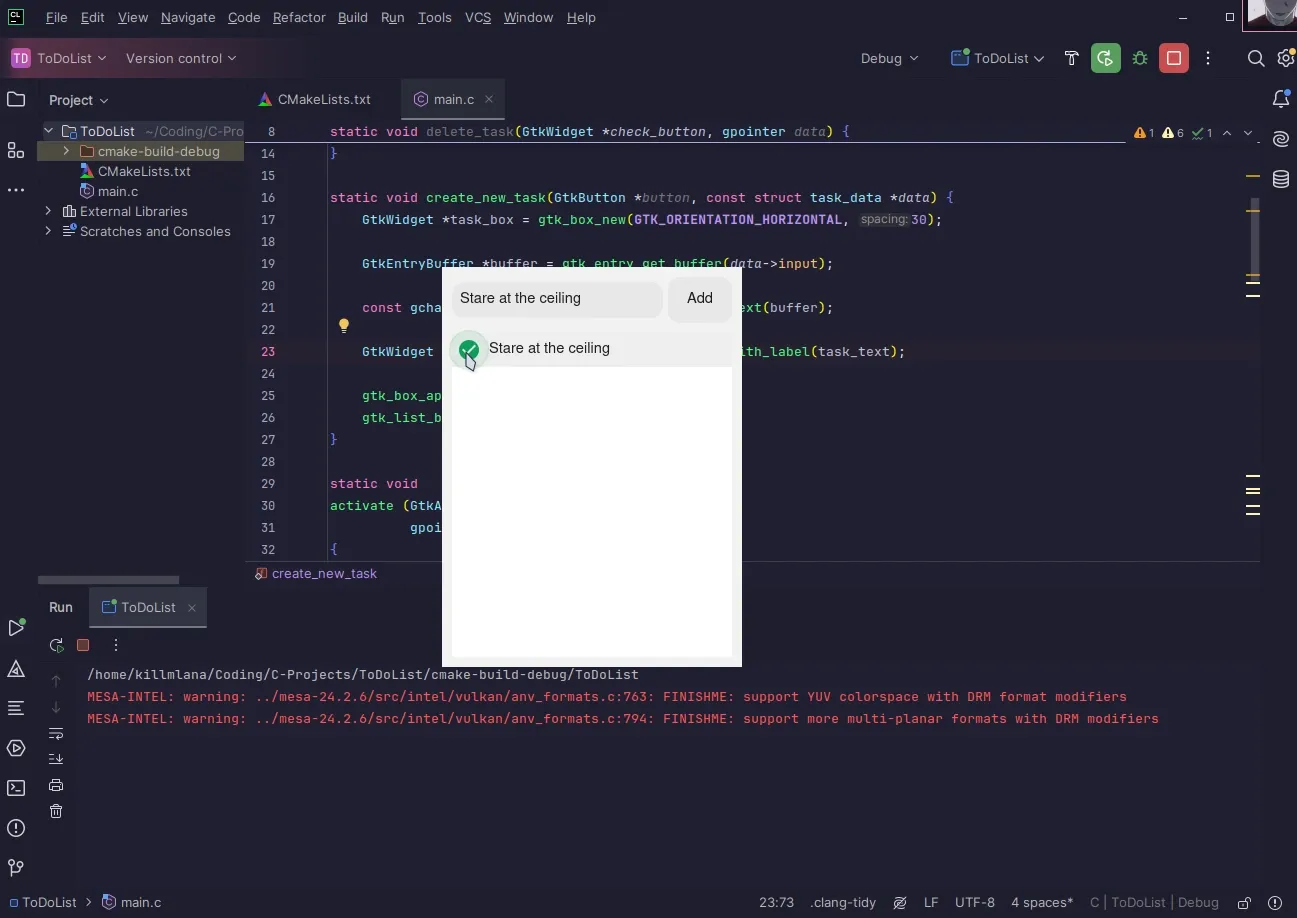
Currently we cannot remove the tasks we have created, well, taking things off a to-do list is the most important part :p. What we want is, upon clicking the check-box, the task is removed from the list. We can use the toggled signal emitted by checkbutton for achieving this purpose.
Just like the previous function, we will define a callback function in the following way,
static void delete_task(GtkCheckButton *check_button, gpointer *data) {}If we want to remove a widget, it can simply be done by getting the parent container and calling the remove function.
static void delete_task(GtkWidget *check_button, gpointer data) {
GtkWidget *task_box = gtk_widget_get_parent(check_button);
GtkWidget *list_box_row = gtk_widget_get_parent(task_box);
GtkWidget *list = gtk_widget_get_parent(list_box_row);
gtk_list_box_remove(GTK_LIST_BOX(list), list_box_row);
}Every container implements an explicit remove function for removing children. In this case we are using gtk_list_box_remove. Now we just need to tie the toggled signal to this callback function. It can be done when the checkbuttons are being created by adding,
static void create_new_task(GtkButton *button, const struct task_data *data) {
GtkWidget *task_box = gtk_box_new(GTK_ORIENTATION_HORIZONTAL, 30);
GtkEntryBuffer *buffer = gtk_entry_get_buffer(data->input);
const gchar *task_text = gtk_entry_buffer_get_text(buffer);
GtkWidget *checkbutton = gtk_check_button_new_with_label(task_text);
g_signal_connect(checkbutton, "toggled", G_CALLBACK (delete_task), NULL);
gtk_box_append(GTK_BOX(task_box), checkbutton);
gtk_list_box_append(data->list, task_box);
}
The final application code should look something like,
#include <gtk/gtk.h>
struct task_data {
GtkEntry *input;
GtkListBox *list;
};
static void delete_task(GtkWidget *check_button, gpointer data) {
GtkWidget *task_box = gtk_widget_get_parent(check_button);
GtkWidget *list_box_row = gtk_widget_get_parent(task_box);
GtkWidget *list = gtk_widget_get_parent(list_box_row);
gtk_list_box_remove(GTK_LIST_BOX(list), list_box_row);
}
static void create_new_task(GtkButton *button, const struct task_data *data) {
GtkWidget *task_box = gtk_box_new(GTK_ORIENTATION_HORIZONTAL, 30);
GtkEntryBuffer *buffer = gtk_entry_get_buffer(data->input);
const gchar *task_text = gtk_entry_buffer_get_text(buffer);
GtkWidget *checkbutton = gtk_check_button_new_with_label(task_text);
g_signal_connect(checkbutton, "toggled", G_CALLBACK (delete_task), NULL);
gtk_box_append(GTK_BOX(task_box), checkbutton);
gtk_list_box_append(data->list, task_box);
}
static void
activate (GtkApplication *app,
gpointer user_data)
{
GtkWidget *window;
//Main Window
window = gtk_application_window_new (app);
gtk_window_set_title (GTK_WINDOW (window), "To-Do List");
gtk_window_set_default_size (GTK_WINDOW (window), 300, 400);
//Main vertically oriented container box
GtkWidget *vbox = gtk_box_new(GTK_ORIENTATION_VERTICAL, 10);
gtk_widget_set_margin_top(vbox, 10);
gtk_widget_set_margin_bottom(vbox, 10);
gtk_widget_set_margin_start(vbox, 10);
gtk_widget_set_margin_end(vbox, 10);
gtk_window_set_child(GTK_WINDOW(window), vbox);
//Container with entry-field and add button
GtkWidget *top_box = gtk_box_new(GTK_ORIENTATION_HORIZONTAL, 5);
gtk_box_set_homogeneous(GTK_BOX(top_box), FALSE);
gtk_box_append(GTK_BOX(vbox), top_box);
GtkWidget *entry = gtk_entry_new();
gtk_widget_set_hexpand(entry, TRUE);
gtk_widget_set_margin_top(entry, 5);
gtk_widget_set_margin_bottom(entry, 5);
gtk_box_append(GTK_BOX(top_box), entry);
GtkWidget *add_button = gtk_button_new_with_label("Add");
gtk_box_append(GTK_BOX(top_box), add_button);
//Widget which will display our list of tasks
GtkWidget *task_list = gtk_list_box_new();
gtk_widget_set_vexpand(task_list, TRUE);
gtk_box_append(GTK_BOX(vbox), task_list);
struct task_data *data = g_new(struct task_data, 1);
data->input = GTK_ENTRY(entry);
data->list = GTK_LIST_BOX(task_list);
g_signal_connect(add_button, "clicked", G_CALLBACK (create_new_task), data );
gtk_window_present (GTK_WINDOW (window));
}
int
main (int argc,
char **argv)
{
GtkApplication *app;
int status;
app = gtk_application_new ("com.mirubytes.ToDoList", G_APPLICATION_DEFAULT_FLAGS);
g_signal_connect (app, "activate", G_CALLBACK (activate), NULL);
status = g_application_run (G_APPLICATION (app), argc, argv);
g_object_unref (app);
return status;
}Conclusion
We’ve successfully built the core functionality of our to-do application! Now, users can add tasks to the list and remove them with a single click on the checkbox. Through this project, we’ve explored GTK’s widgets, signal handling, and how to dynamically create and remove elements within a GtkListBox.
Our application still looks pretty ugly, we can fix that by styling our widgets. We shall discuss that in the next post :3.
Thank you for sticking till the end and hope you have a great day ;)
