Introduction
Hello, everyone! Lana here, and welcome to the first part of our series on programming graphical interface applications for Linux. In this tutorial, we’ll be using GTK, a toolkit for building graphical interfaces. I will be using CLion in this tutorial but VsCode is fine as well.
In this part, we’ll focus on setting up our development environment and creating a simple “Hello World” application. This may seem basic, but it’s an essential step to ensure everything is in place and working correctly before diving into more complex projects. By the end of this guide, you’ll be able to create and run a basic GTK application on Linux, setting the foundation for building more advanced graphical programs in future installments of this series.
So, let’s get started.
Prerequisites
It’s highly recommended to use a linux environment for GTK development.
- Basic knowledge of
Cprogramming language. PkgConfiglibraryGTK-4library
Setting Up the Development Environment
In this section, we’ll set up the development environment by creating a new project. This setup will establish the basic structure of our project, including a CMakeLists.txt file for managing our build configuration and a main.c file with the “Hello World” code.
Step 1. Creating a New Project
- Open CLion and start a new project, we will name it “HelloWorld”.
- Choose the
C11standard or later as your project type, we are usingC11in this tutorial.
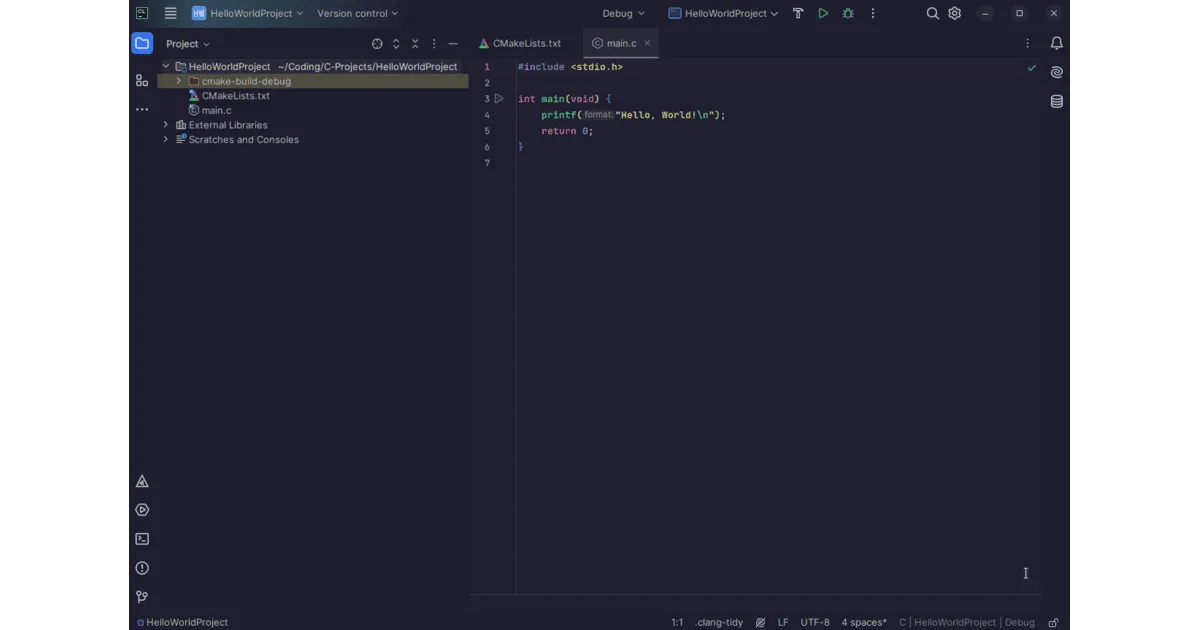
CLion will set up the project directory with the necessary files, including a CMakeLists.txt file for configuring the project build and a main.c file where we’ll write our code.

Project Structure
After setting up, your project directory should look something like this:
CMakeLists.txt- Used to define the project build settings.main.c- This file will include the basic “Hello World” code to ensure everything is set up correctly.
Once you have these files in place, we’re ready to dive into writing the code for our “Hello World” application in GTK!
Step 2. Setting up CMake
First we would need to configure CMake to work with GTK or else you will be getting red squiggly lines everywhere while importing the libs :p
In your CMakeLists.txt paste the following configuration.
cmake_minimum_required(VERSION 3.20)
project(HelloWorld C)
set(CMAKE_C_STANDARD 11)
set(SOURCE_FILES main.c)
find_package(PkgConfig REQUIRED)
pkg_check_modules(GTK REQUIRED gtk4)
include_directories(${GTK_INCLUDE_DIRS})
link_directories(${GTK_LIBRARY_DIRS})
add_executable(${PROJECT_NAME} ${SOURCE_FILES})
target_link_libraries(${PROJECT_NAME} ${GTK_LIBRARIES})These commands ensure that GTK dependencies are found, included, and linked correctly, allowing us to build and run our application with GTK.
Writing the Application
Now that we got that out of the way we can get started with building the application. It can be a bit hard to grasp in your first read and I am bad at explaining but I will try my best to simplify.
First let us import the gtk.h header file,
#include <gtk/gtk.h>Now we will define our function which prints “Hello World” into the terminal
static void
print_hello (GtkWidget *widget)
{
g_print ("Hello World\n");
}Here our function takes in a pointer to a GtkWidget as a parameter. GtkWidget can be any widget like a button or something which will be calling this function as we will see later.
Let us continue to write the function which will be used to create the window and button of our application.
static void
start (GtkApplication *app, gpointer user_data)
{
GtkWidget *window = gtk_application_window_new (app);
GtkWidget *button = gtk_button_new_with_label ("Hello World");
g_signal_connect (button, "clicked", G_CALLBACK (print_hello), NULL);
gtk_window_set_child (GTK_WINDOW (window), button);
gtk_window_present (GTK_WINDOW (window));
}Here we are creating a GtkWidget *button for initiating a callback to the print_hello function we had defined before via g_signal_connect (button, "clicked", G_CALLBACK (print_hello), NULL). We will wrap this button with GtkWidget *window via gtk_window_set_child (GTK_WINDOW (window), button).
Finally we are displaying the window using gtk_window_present (GTK_WINDOW (window))
You can also set the window title and the default size of the window by using
gtk_window_set_title (GTK_WINDOW (window), "Hello");
gtk_window_set_default_size (GTK_WINDOW (window), width, height);Now we will define the main function which will initialise and run everything
int
main (int argc,
char **argv)
{
GtkApplication *app;
int status;
app = gtk_application_new ("com.mirubytes.helloworld", G_APPLICATION_DEFAULT_FLAGS);
g_signal_connect (app, "activate", G_CALLBACK (start), NULL);
status = g_application_run (G_APPLICATION (app), argc, argv);
g_object_unref (app);
return status;
}Here, app is the pointer to a new instance of GtkApplication and status returns the status code of the application.
gtk_application_new ("com.mirubytes.helloworld", G_APPLICATION_DEFAULT_FLAGS);In the above line we are creating a new application instance, where com.mirubytes.helloworld is the application ID. There are certain conventions around naming the application which you can read more about here.
Next we will set our window to spawn on application startup. This can be done by using activate signal. activate signal is emitted on application startup and can be used to perform callbacks to functions by using g_signal_connect.
g_signal_connect (app, "activate", G_CALLBACK (start), NULL);In the above line we are setting the activate signal to invoke a callback to the start function we had defined earlier.
status = g_application_run (G_APPLICATION (app), argc, argv);
g_object_unref (app);
return status;Finally we are storing the status code of the application and then clearing the memory on application end using g_object_unref
The complete application code should look something like this,
#include <gtk/gtk.h>
static void
print_hello (GtkWidget *widget)
{
g_print ("Hello World\n");
}
static void
start (GtkApplication *app,
gpointer user_data)
{
GtkWidget *window;
GtkWidget *button;
window = gtk_application_window_new (app);
gtk_window_set_title (GTK_WINDOW (window), "Hello");
gtk_window_set_default_size (GTK_WINDOW (window), 200, 200);
button = gtk_button_new_with_label ("Hello World");
g_signal_connect (button, "clicked", G_CALLBACK (print_hello), NULL);
gtk_window_set_child (GTK_WINDOW (window), button);
gtk_window_present (GTK_WINDOW (window));
}
int
main (int argc,
char **argv)
{
GtkApplication *app;
int status;
app = gtk_application_new ("com.mirubytes.helloworld", G_APPLICATION_DEFAULT_FLAGS);
g_signal_connect (app, "activate", G_CALLBACK (start), NULL);
status = g_application_run (G_APPLICATION (app), argc, argv);
g_object_unref (app);
return status;
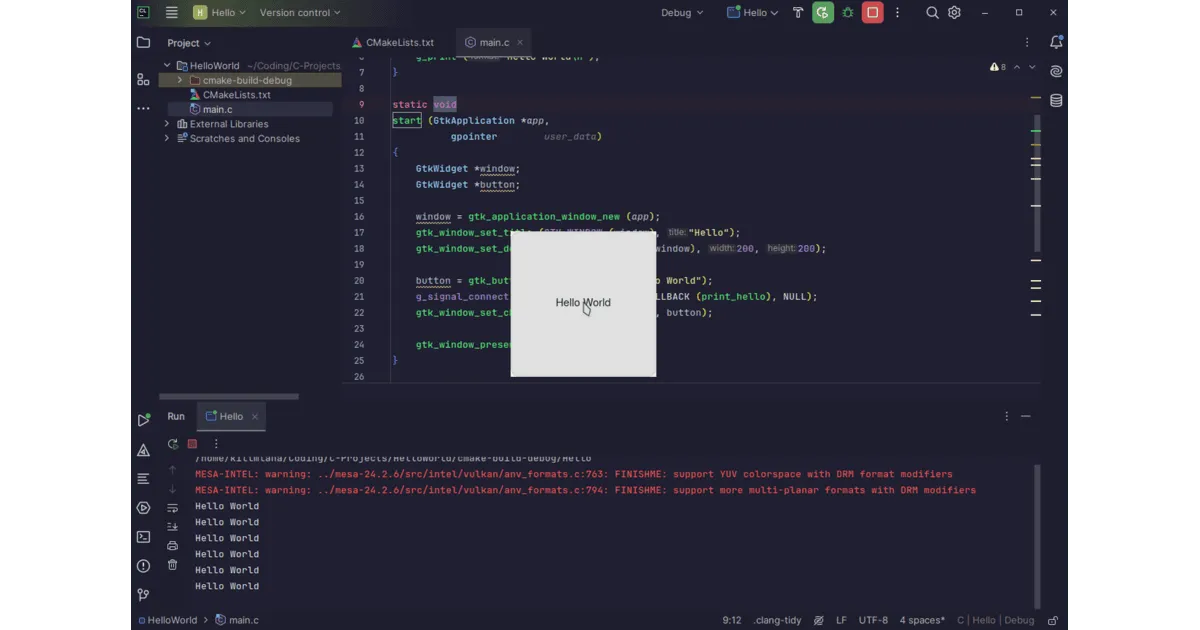
}Upon running our program we should have a window with a hello world button which prints “Hello World” to console upon clicking :)

Conclusion
Congratulations! You’ve just set up your first GTK-based application on Linux :)
In the next parts of this series, we’ll dive deeper into GTK’s features. Stay tuned, curious and keep experimenting to make the most out of your journey!
